

So, here's where I'll sit and rant about this, that and the other, subject folks to my curious obsessions and generally faff about...
Friday, May 13, 2011
Warhammer - Portraits
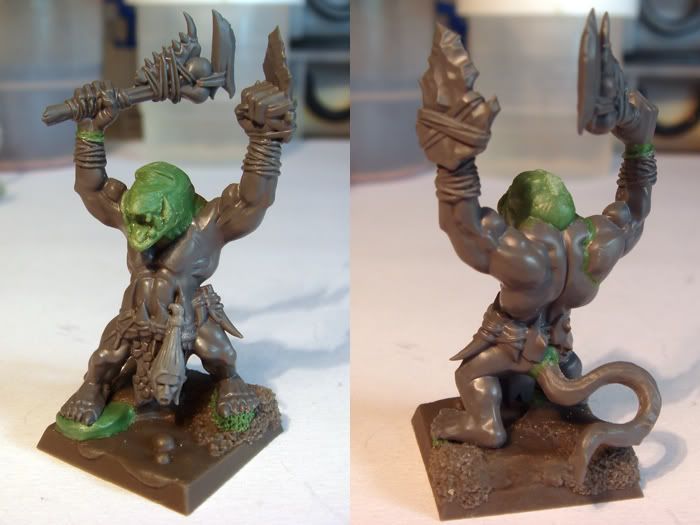
This is a commission I finished recently. It's a portrait of a gamer mate of mine as his two favourite armies, which ended up a Spanish flavoured ogre man-eater. I've done a bunch of these for people who wanted to be immortalised as a member of their favourite army, faction, gang or whatever you're having yourself.


Fimir - Masked Fimm
I'm getting to the point now where I'm not posting every fimm I make, but this fellow is another of my cast heads, the leather-hooded fimm. The detail and shape of the hood doesn't come out on the photo as well as it does in the flesh, I'm afraid, but the face is at least quite clear. I'm pretty happy with it, which leaves only the helmeted fimm to go. At this stage I have 7 out of 20 fimm complete for the first unit, but the filler I plan will take up four spaces, leaving 9 fimm to go. Getting there!

Tuesday, May 10, 2011
Modelling - Press Moulding
Okay. I've had some success with Instant Mould in getting my fimir heads sorted, so I thought I'd put up this wee tutorial to share the things I've learned during the process. This tutorial applies to anyone trying to mould a part like a head, weapon, anything with two sides. Here we go, step-by-step with Doctor Saturday's press moulding workshop.

Step 1
Find a container not too much bigger than the object you are planning to make a mould of. This is important as you need something that will contain the instant mould so that when you press the part in, the instant mould has nowhere to go, and presses back into the detail of the part.

Step 2
Pour some boiling water in another container, and add your stick(s) of instant mould. Give it a minute until it becomes soft and pliable. Use the rest of the water to make tea.

Step 3
Lift the instant mould out of the water with tweezers. If it's quite melty, you're ready to rock.

Step 4
Press the instant mould into the mould container, to about half way. Make sure you have enough material ready to make the entire mould, as this stuff hardens up pretty quick.

Step 5
Press your part into the material, in this case, my fimir head. I pressed it face in, not profile, as I didn't want any lines along the face where the second dose of instant mould went in. This turned out to be no problem anyway.

Step 6
Add the second lot of instant mould, pressing in until you can press nae more. Allow to harden for a few minutes.

Step 7
This part can be a pain. Instant mould doesn't stick to much, but it can still be a job getting the mould out of the container. I use these rather sharp tweezers to dig into a non-essential part of the mould and pull it out. Pear down the edges of the mould if needs be. Cut it close to the actual edge of the part, but still leave about 3-5mm so it doesn't tear when you take out the master part.
 Step 8
Here's the most vital bit. Press moulding is not going to yield the same results as using liquid metal/plastic, which flows into all the detail, yielding nice, crisp models. The way around this is the application of brute force. The mould isn't going to be two part. First, we need to extract the master part. Cut a line, in this case aiming toward the back of the head and neck, so the mould opens just enough to pull out the part, leaving the moulding of the face and such untouched. Next, carve enough space at the back of the head and neck so you can push in the greenstuff.

Step 9
The reason for the large opening is to give you enough room so you can shove the greenstuff (or whatever) into the mould's detail using something the size of a paintbrush end to give you a better casting. Keep the end of the tool you're using wet to stop the greenstuff gripping it. I can't emphasise how violent you need to be here. You need to keep adding and shoving in greenstuff until it starts pushing back at you. leave it to cure. Have more tea.

Step 10
Hopefully, all that agression will have forced the greenstuff into the required shape. If not, try again, THEN melt the mould and it's back to step 1. It took four attempts to get the heads to come out decent.
If so, tea all round. Huzzah!

Step 1
Find a container not too much bigger than the object you are planning to make a mould of. This is important as you need something that will contain the instant mould so that when you press the part in, the instant mould has nowhere to go, and presses back into the detail of the part.

Step 2
Pour some boiling water in another container, and add your stick(s) of instant mould. Give it a minute until it becomes soft and pliable. Use the rest of the water to make tea.

Step 3
Lift the instant mould out of the water with tweezers. If it's quite melty, you're ready to rock.

Step 4
Press the instant mould into the mould container, to about half way. Make sure you have enough material ready to make the entire mould, as this stuff hardens up pretty quick.

Step 5
Press your part into the material, in this case, my fimir head. I pressed it face in, not profile, as I didn't want any lines along the face where the second dose of instant mould went in. This turned out to be no problem anyway.

Step 6
Add the second lot of instant mould, pressing in until you can press nae more. Allow to harden for a few minutes.

Step 7
This part can be a pain. Instant mould doesn't stick to much, but it can still be a job getting the mould out of the container. I use these rather sharp tweezers to dig into a non-essential part of the mould and pull it out. Pear down the edges of the mould if needs be. Cut it close to the actual edge of the part, but still leave about 3-5mm so it doesn't tear when you take out the master part.
 Step 8
Here's the most vital bit. Press moulding is not going to yield the same results as using liquid metal/plastic, which flows into all the detail, yielding nice, crisp models. The way around this is the application of brute force. The mould isn't going to be two part. First, we need to extract the master part. Cut a line, in this case aiming toward the back of the head and neck, so the mould opens just enough to pull out the part, leaving the moulding of the face and such untouched. Next, carve enough space at the back of the head and neck so you can push in the greenstuff.

Step 9
The reason for the large opening is to give you enough room so you can shove the greenstuff (or whatever) into the mould's detail using something the size of a paintbrush end to give you a better casting. Keep the end of the tool you're using wet to stop the greenstuff gripping it. I can't emphasise how violent you need to be here. You need to keep adding and shoving in greenstuff until it starts pushing back at you. leave it to cure. Have more tea.

Step 10
Hopefully, all that agression will have forced the greenstuff into the required shape. If not, try again, THEN melt the mould and it's back to step 1. It took four attempts to get the heads to come out decent.
If so, tea all round. Huzzah!
Fimir - Cast Fimm Heads
A red letter day in the construction of the army! I managed to finally get my moulds to produce good quality castings, so I'm back on the fimm assembly line. (I'll be putting up a tutorial for how I made the moulds later) I was quite worried about this head, as it was my most ambitious sculpt to date, with all the gaps among the teeth I wondered with it make a decent mould at all, but it worked better than I expected, after several attempts. I'll be putting up some pictures of the helmeted and hooded fimm in the next day or two.

Saturday, May 7, 2011
Fimir - Fianna Fimm Assembled
 The first fianna fimm unit is assembled, wondrous. I had to wait for more greenstuff to arrive to finish them, but now they are ready for some paint. I have a sexy movement tray ordered from Base-X-of War, (thank you, Unseen Lerker) which should look very nice indeed. The swamp bases and trays they make have hollow sections where you can pour water effects for extra swampyness. I still need to attach some more brass-etched foliage, but that should be it, and then the paint can flow.
Now, back to wrestling with these moulds.
Thursday, May 5, 2011
The Vampire General - Bat Swarms
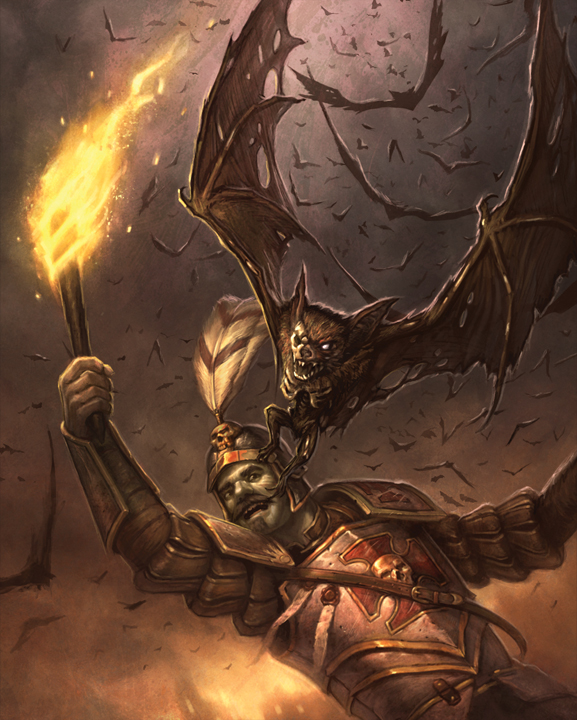 Ah, the humble bat swarm, one of the most rarely used units in the vampire counts army, and with good reason, for they have little use in any list I can think of.
Redirectors, you say! Well, at 35 points each, I'd happily take one spirit host (65pts) or four fell bats (80pts) for two bat swarms (70pts) any day. But, Mr Saturday, they're fast, you holler in hoarse desperation. True, they have Swiftstride, but again, our spirit host is as fast on average with movement 6, and the fell bats, they fly as well. Aha, you thunder, triumph in your eyes, they can hunt war machines. Weeelll....technically, yes. However, with strength and toughness 2, they may hold up a machine for a turn or two, but I doubt they'll destroy it. They may pass on some nasty disease to the crew, certainly a painful scratch or two, but that won't help your vampire lord with the cannon ball tombstone. At least they use up core points, you scream, tears rolling down your face. Nope, sorry, they don't count toward core points.
Now, pull yourself together, and we'll go through the motions. Here's the stats for our ineffectual little critters:
M WS BS S T W I A LD
1 3 0 2 2 4 1 4 3
Yes. Rah-hu-ba-hish. They are also a swarm, but as undead don't use the squish rules, using unstable instead. Now, again, the main value of these guys would be as redirectors and general irritation. Yes, they have 4 wounds, the fell bats have only 2. But you almost get two fellbats per base of bats. As for spirit hosts, they are almost two bats per base of spirit host, and they are ETHEREAL, which will stop anything short of a magic cannonball. So, in the support unit stakes, the bats come out poorly. So poor, in fact, that there really is no need to elaborate much further. The only real use I can see for bats are screening. They can soak up more damage than a fellbat, and you get two (almost) for one spirit host, so they can cover more space, BUT, with true line of sight this is of dubious value against shooting.
So, a big thumbs down from the vampire general. Next up, the corpse cart.
Sunday, May 1, 2011
It Ain't Easy Being (Without) Green
Bleedin' Nora! I've run out of greenstuff, so my fimir building has ground to a complete halt. Aaargh! Hurry Mr Postman, I grow impatient. I'm right in the middle of making moulds for the fimir heads, which is not going that well, I seem to be having problems getting the detail to take in the mould. Still, it took a few attempts for the first mould, which eventually turned out great, I just need to persevere.I think while I'm waiting I'll clean up some fimir parts for assembly and perhaps even base some of my poor neglected ghouls...

Subscribe to:
Posts (Atom)
Wayland Games

